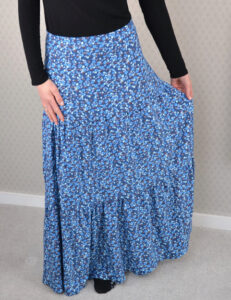
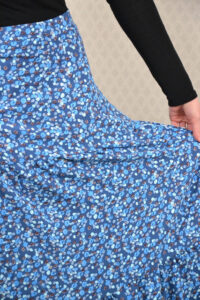
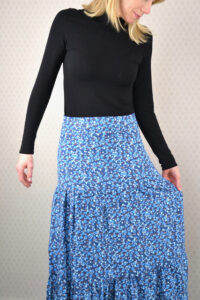
This is my first experience using a Fibre Mood pattern and first came across it on instagram when I saw a gorgeous version by Charlie Wensley which prompted me to start following the hashtag #hettieskirt. That’s how a lot of my handmade garments start – inspiration online (usually instagram) when I see a garment and think I need to make that! Sometimes I will just start following the hashtag and wait for some more versions to come along until I eventually succumb and buy the pattern or decide it’s not for me. Other times it’s immediate – I know I want to make it and so I dive straight in and order the pattern.
When I saw the Hettie skirt I absolutely loved the 3 tiered version – it looked quite fitted around the waist which I find to be the most flattering shape on me and could really picture myself wearing one. I wondered if I had any fabric in my stash that would be suitable. I knew it would have to have a good amount of drape in it, being the style it was and I thought of some fabric I received in a recent Sew Hayley Jane subscription box. This is a fabulous subscription box where you get a box full of surprise sewing goodies each month – it’s a bit of a risk if you don’t like the main fabric but it does open your eyes as to other possibilities that you wouldn’t necessarily choose yourself which is what I like about it. If I’m perfectly honest I wouldn’t have chosen this fabric as something that I loved but I knew it would be the right match for this pattern. I wouldn’t have chosen to make a full length garment from it like a dress or jumpsuit but I thought a skirt with a plain top would be more suited to my style.
The fabric is a blue viscose with mini spots on that are different shades of blue and also black/white.
With little to lose I bought the pattern. Fibre Mood releases magazines 5 times a year that you can subscribe to and have numerous different sewing patterns in. The Hettie Skirt is in edition 8 released in 2020. I however, just wanted to make the Hettie Skirt initially so I bought the PDF version of the pattern from their website. Once you have registered to be a user, you can access the instructions online. There is also a sew along on instagram too. I chose to print off the PDF pattern at home which took some time as there were 37 pages!
A couple of things that I thought could be improved upon with the pattern is that firstly the pattern pieces have numbers on but no description of what pattern piece they are and how many to cut of them for example, middle flounce front, cut 1 on fold. I wrote them on myself so it wasn’t too much of an issue but it would be nice to have them on there already as some of the pattern pieces look quite similar with the tiered pieces being rectangular. Secondly there are 2 lines around the outside of each pattern piece – one for the pattern piece without the seam allowance included and another line with the seam allowance added on. I’m not sure why you need the inside line – I got confused by all of the lines – there are way too many!! What I would point out here is the seam allowance for this pattern is 1cm. I couldn’t find this anywhere but eventually figured it by watching the sew along. Unless I missed it somewhere really obvious, I couldn’t find it easily. I think you are supposed to deduce it from where they tell you to draw in the seam allowances around the pattern pieces but it looks as though they already have done it – that’s where I got confused!
Once I got the pattern pieces cut out and had figured out the seam allowance, the sewing was quite straightforward with clear instructions. For the construction I used my regular sewing machine with my overlocker to neaten the raw edges inside. I was careful to practice the overlocking stitch on some scraps of the fabric first of all as one of the last times I sewed with viscose I don’t think I had it on the right setting and it caused the raw edges to go all wavy. This altered how the garment hung – it effectively ruined the garment. Having learnt from that, I had a feeling that I would need to reduce the differential feed to stop the wavy edge. I reduced it from 1.0 to 0.5 and it worked! It’s only a subtle difference as you can see below but I really wanted to get this one right.


Bottom sample – differential feed 1.0
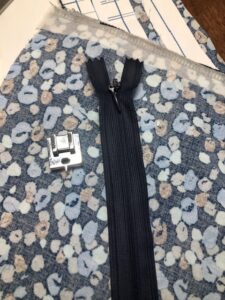
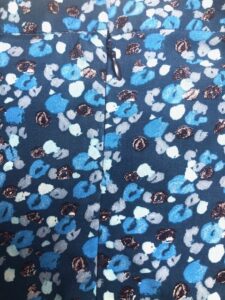
The skirt has an invisible zip in the back. I applied a strip of interfacing either side of the centre back seam where the zip would be inserted to help stabilise it. This helped ensure the zip went in as smoothy as possible and didn’t cause the viscose to pucker. I used an invisible zipper foot which I always use when inserting a concealed zip and took my time!
What I love about becoming more experienced in dressmaking is using the pattern instructions to follow and help you but if you know a certain technique would be useful to use at a certain part then to add it in. I call it your sewing tool box – the more tools (skills) you have in your tool box, the better. A lot of that comes from practise and sewing a lot of different patterns using different techniques – transferable skills. An example of this is at the waistband. Firstly I decided to insert the waistband a lot earlier than the instructions suggested. I knew as the weight of the skirt layers were added, it would become more difficult to handle in the machine so I added the waistband to just the top flounce and then added the middle and lower flounces after. I also cut notches into the curved sections of the seam allowances after joining the two waist band pieces together as this helps the waistband to lie flat.

After finishing the waistband, disaster struck….I mean look at the photo below and how the 2 sides don’t match up – they are nowhere near!! I’ve no idea how this happened but I was able to use my trusty unpicker to salvage it just about!


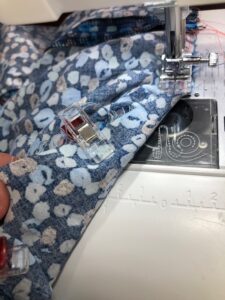
As you can imagine with a multi tiered skirt – there was a lot of gathering! The gathering is created by sewing two parallel lines of longer length stitches along the top edge of the flounce, within the seam allowance. It is important to leave long ends at the beginning and end as these are used to pull on to gather the fabric. It is useful to do these gathering stitches in a contrasting colour thread so they are easier to see and unpick after you have sewed the tiers together. I found it easier to split the gathering stitches into sections round the skirt pieces as otherwise it can be a long distance you are gathering between. The thread can break and the gathers might be difficult to get even.

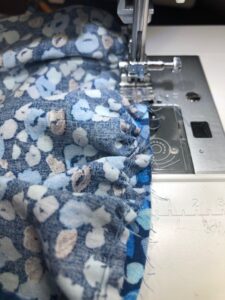

Instead of a button and buttonhole, I used a couple of small poppers for the waistband fastening.
To finish the skirt, I used the blind hem foot on my sewing machine to sew a blind hem for a nice clean, neat finish.


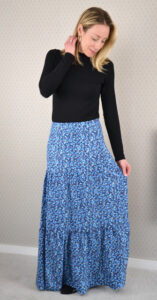
The thing that has most impressed me about the skirt is the fit – it is spot on. My waist measurement was 72cm and hips 92cm. Based on these, I cut a size 10 at the waist (the finished waist measurement for the size 8 was 72cm so there would be no ease whatsoever with that size) and graded to a size 8 at the hips. It fits perfectly at the waist which pleases me no end!
In summary despite the initial challenges with the actual pattern pieces, now I have them cut out I am definitely going to be making another version as it is such a great fit and style. I have some double glaze which I think will be lovely for another version.
A couple more piccies before I finish – hopefully I can get some nice outside shots once the weather improves here in the UK! I can imagine wearing this with a vest top, denim jacket and flip flops.
